This PSEB 9th Class Computer Notes Chapter 5 Introduction to MS-Access will help you in revision during exams.
PSEB 9th Class Computer Notes Chapter 5 Introduction to MS-Access
Data has become an important part of human life. It has increased the need of data management. This need has given birth to various software. MS Access is one of the most common software in this category.
![]()
MS-Access:
Access is a Relational Database Management System (RDBMS). It is used for database creation and management. MS-Access Allow user to perform basic tasks such as opening and closing database, Creating tables, Forms, queries and Reports. If we want to understand Access, Firstly we must have to understand databases.
It is part of the MS Office software suite. It is used in millions of corporate firms across the globe and in homes also.
MS Access is used to store and retrieve large amounts of data. It can be used for something simple such as keeping a record of your books collection or for something larger such as invoicing/ stock management.
Relational Database:
Relational database was proposed by Edgar Codd around 1969. It has since become the dominant database model for commercial applications.
A relational database organizes data in tables. A table is made up of rows and columns. A row is also called a record. A column is also called a field.
MS-ACCESS is a relational database management system. Relational databases allow you to organize your data into tables; each table focuses on a specific topic; the various tables can then be linked to each other for inquiry and reporting purposes.
![]()
Guidelines to design a Database:
- Identify all the fields needed by you to produce the required information
- Organize each piece of data into its smallest useful part to make the design perfect.
- Make group related fields into tables
- Determine each table’s primary key which will uniquely identified.
- You will have to Include a common field in related tables.
Some Technical Words of Access:
Access arranges and divided database as under:
- Database file: The database file is the main file of database which consists the whole data of the document.
- Table: A table is the basic element of a Database and contains the data entered by users. Each row (or record) contains information about a particular item.
- The record is made up of several fields; each field contains one piece of information relating to the item.
- Fields: A field is an individual set of data items that are of the same type.
- Data Types: Databases consist of tables, tables consist of fields and fields are of a certain data type.
Components of MS Access:
- Table: Tables are the data storage facilities in MS Acfcess. Each table contains rows called records and columns called fields. A record is a collection of facts about a particular person or an organization. Each record in a table should be unique.
- Queries: A query that copies or changes data. Queries include append, delete, make-table, and update queries. A query that asks a question about the data stored in your tables and returns a result set in the form of a datasheet, without changing the data.
- Forms: Forms provides us friendly environment to view the data in which it shows a single record at a time.
- Reports: Reports provide a means of organizing and summarizing data. A report can be a simple list, a student’s report or a school report.
- Macros: Macro is an automatic action that should be performed to an object of the data. It allow users to their work automatically.
- Modules: A module is collection of procedure statement and declaration which are stores as unit. Module are verv similar to macros.
- Database objects: Databases in Access 2010 are composed of four objects: tables, queries, forms, and reports.
Data Types:
In access many types of data types can be used the data type is decided before creating a table. We know there are different data types of table. Some of the important data types of access are given below:
| Data types | Size/Format | Storage Capacity | Functions |
| Text | Up to 255 characters | Text – including numeric text (eg phone numbers) | Text consists of digits/ numbers, letters or their combination. It can have maximum of 255 letters. |
| Number | Long Integer Integer Single and double bytes | Whole numbers | Numbers been used only from the prescribed size which we will declare in document. |
| Data types | General | Both date & time | It is used for date and time. The data can vary from 100 to 9999. it is 8 byte long |
| Yes/no | Yes/No True/False On/Off | N.A | For data with only 2 possible values. It is used for logical values. |
| Currency | Currency Scientific, percentage | Up to 15 figures | It can also be use in mathematics or scientific functions. |
| Auto Number | N.A | Automatic counter- incremented by 1 for each record | It is used in all numeric programs it automatically give increment to a number. |
| Memo | Up to 65535 characters | Longer pieces of text | Memo is used in where we have to enter a longer text |
| OLE Object video |
N.A | For pictures, sound, videos, word/excel, documents or any other docs. | It is been used to insert picture, sound, videos, word/excel, documents |
| Hyperlink | N.A | N.A | It is used For links to the WWW or e-mail |
| Calculated | N.A | N.A | This data type allow you to create a field that is based on a calculation of other fields in the same table |
![]()
Advantages of Access:
- Convenient storage capacity: A Microsoft Access database can hold up to 2 GB of data. *
- Easy installation and work: Access gives data managers a fully functional, relational database management system.
- Easy to participate: Access works well with many of the developing software programs based in Windows like Microsoft SQL Server and non-Microsoft products like Oracle and Sybase.
- Importing data: Microsoft Access allow user to import their important data.
- Multi-user support: More About ten users in a network can use an Access application.
- Popular Rdbms: Microsoft Access is the most popular desktop Relational database system in the world.
- Saves your money: Microsoft Access is more economical than other larger systems; offering the same functions and usage.
- Secure Database: MS access is secure database system information is secure which you saved on it.
Starting access:
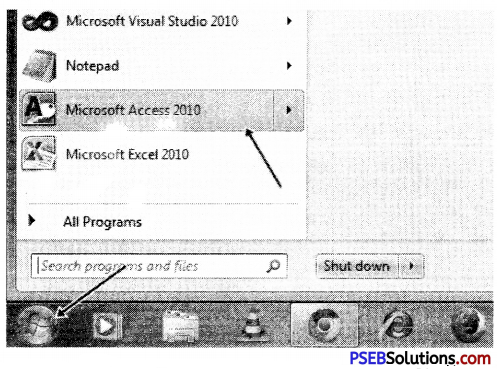
To start access 2010 from the start menu:
Click the start button, click all programs, click Microsoft office, and then click Microsoft access 2010. The new page of the backstage view opens, displaying thumbnails of the available templates and template categories.
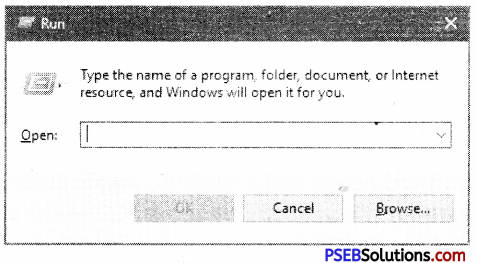
Another shortcut way to open access is Press windows kev with R it will open run command window on Run command type MS access is blank box.
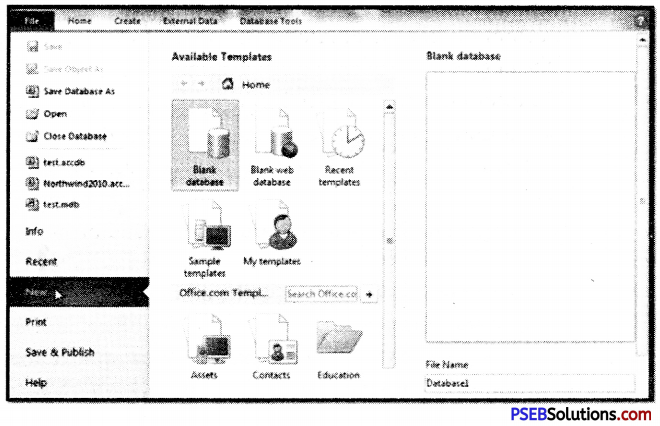
After the open of MS access you have to click on the blank database available Under templates.
![]()
Working with Tables:
A table is a database object that vou define and use to store data update DATA. A table consists of records and fields. Every record contains data about one instance of the subject.
Creating and Modifying tables:
When you create a new table, you have complete control over the number of fields, the names of the fields, and what sort of data they can store. You can create a new table in the either datasheet view or design view.
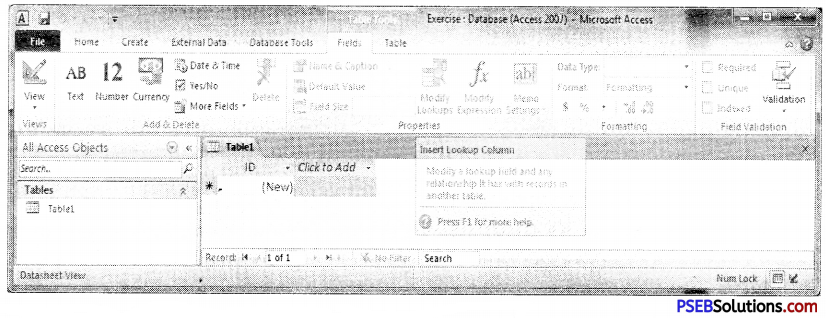
Creating tables in datasheet view
To create a table in datasheet view:
On the create tab, in the tables group, click the table button. A new blank table opens in the object window in datasheet view.
Adding fields by entering data:
Whenever you add a new column to the datasheet, a new field is defined in the table.
- Click in the first cell in the click to add COLUMN, ENTER the first item of data for the new record, and then press the tab or enter key to move the first cell in the column to the right.
- Access AUTOMATICALLY ASSIGNS the value 1 to the id field.
- WHEN THE record has been changed, but has not yet been saved.
- Click the pencil icon in the row selector. This saves the first record with the value 1 assigned to the id field; subsequent records will be numbered sequentially.
- Continue entering items of data in consecutive cells, and pressing the tab or enter key.
- When you finish entering all the data for the first record, click anywhere in the row below to save the record.
- After entering so many records as per your requirement you have to save the table
![]()
Creating Tables in design view:
In Design view, the Object window consists of two panes. The field Entry pane, located at the top of the window, is used to enter each field’s name, data type, and description. The field properties pane, located at the bottom of the window, is used to specify the field’s properties. The properties available in the Field properties pane depend on the data type assigned.

To create a table in Design view:
On the create tab, in the Table Design button. A New, blank table opens in the object window in Design view.
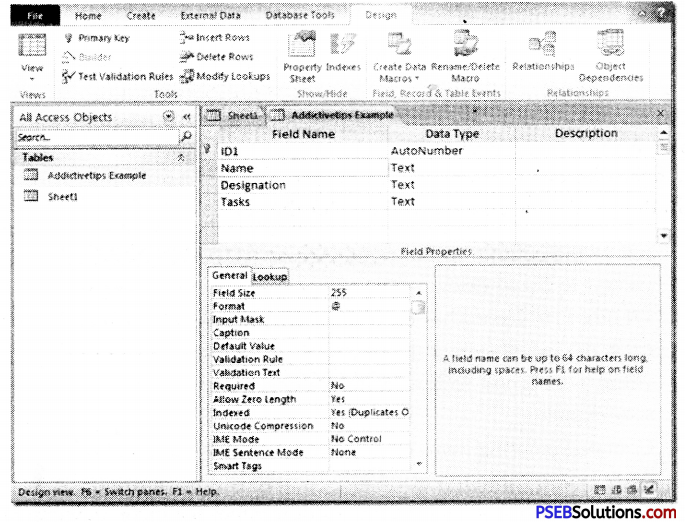
1. In the field name column, type a name for the first field. Field names can be up to 64 characters long. They can include any combination of letters, numbers, spaces, and brackets etc.
2. In the data type column click the down arrow and select a data type from the list).
3. In the description column, type a description for the field.
4. Repeat steps 2 through 4 to add additional fields to the table. After entering the all fields save the table.
Setting a primary key:
A primary key consists of one or more fields that uniquely identify each record in the table there are several advantages to setting a primary key.
To set a primary key follow these steps:
1. Click the row selector of the field you want to designate as the primary key.
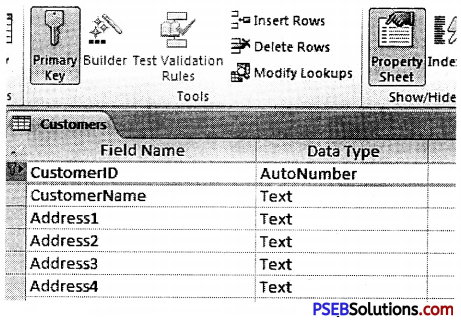
2. In the design tab, in the tools group, click the primary key button. A key icon appears to the left of the field that you specify as the primary key.
![]()
Saving tables:
To save a table for the first time:
1. On the quick access toolbar, click the save button. The save as dialog box opens
2. In the table name box, type a name for the table.
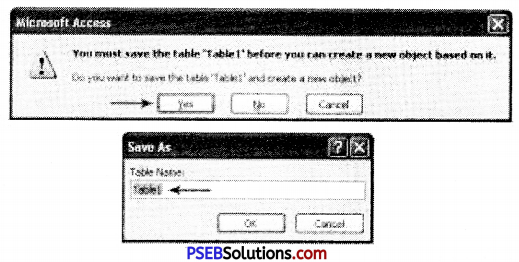
Click the ok button. The table appears in the tables list in the navigation pane.
Closing database
To close a database:
Click the file tab, and then click close database.
Exiting access
To exit access 2010:
1. Click the file tab, and then click exit. Or, click the close button in the upper- right corner of the program window.
2. Another option is to exit Access is Press ALT+F4 key together. With this option you will exit from access in very easy way
Forms:
Forms are used for entering, modifying, and viewing records. The reason forms are used so often is that they’re an easy way to guide people into entering data correctly.
Creating forms:
It is always very convenient to work in forms. It is more comfortable easier and popular to enter data by forms that by datasheet view. Forms can be prepared by following two methods.
Create a form to display your data
1. To create a quick screen in MS Access 2010 simply go to the navigation pane and click to highlight the table you wish to base the form on.
2. Now click on the create tab.
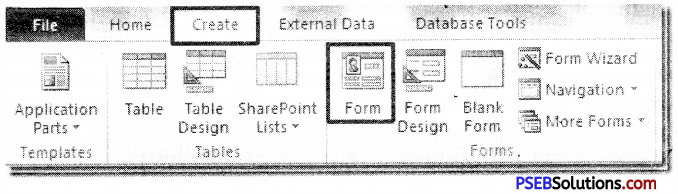
3. In the forms section click on the button named ‘Form’.
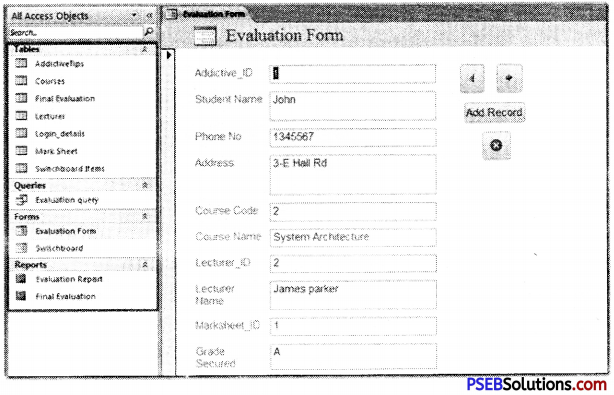
4. MS Access creates a nice simple form. Click on any of the text boxes to position the cursor and edit the data.
At the bottom you have navigation buttons to move you from record to each record
![]()
Sorting:
1. Result could be sorted by Name or by the marks of the students who were appear in exam
2. Students could be sorted by name or by the roll no.
3. Students could be sorted by class.
You can sort both text and numbers in two ways: in ascending order and descending order. Ascending means going up, so an ascending sort will arrange numbers from smallest to largest and text from A to Z.
Descending means going down, or largest to smallest for numbers and Z to A for text. The default ID number sort that appears in your tables is an ascending sort, which is why the lowest ID numbers appear first.
Steps to sort student table are as follows:
1. Select a field in the cell you want to sort by. In student table, we will sort by student name.
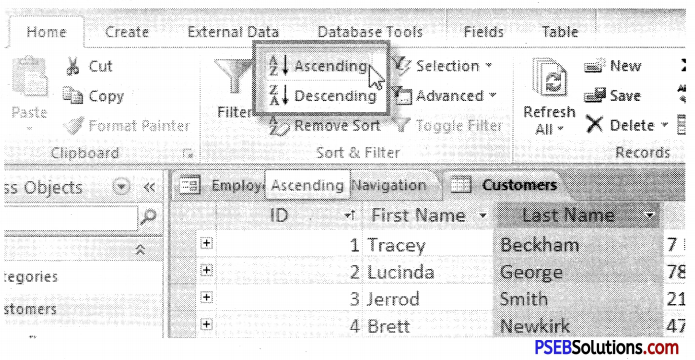
2. Click the Home tab on the Ribbon, and locate the Sort & Filter group.
3. Sort the field by selecting the Ascending or Descending command.
(a) Select Ascending to sort text A to Z or to sort numbers from smallest to largest.
(b) Select Descending to sort text Z to A or to sort numbers from largest to smallest.
The table will now be sorted by the selected field.
To save the new sort, click the Save command on the Quick Access toolbar.
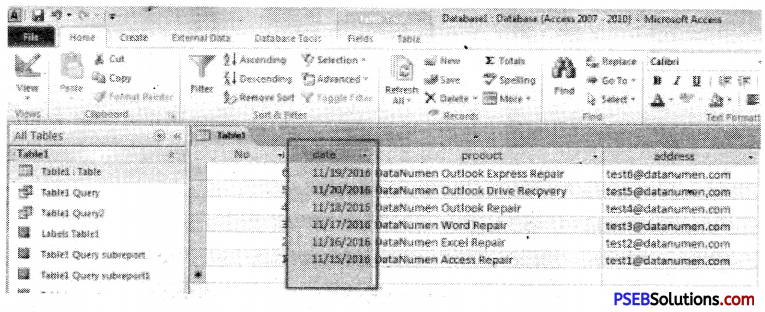
Data Filters:
Filters is the concept in MS-Access which allow you to view only the data you want to see. The filter then searches all of the records in the table, finds the ones that meet your search criteria, and temporarily hides the other data.
Filters are useful because they allow you to look upon on specific records without any distraction by the uninterested data. Viewing this data with a filter would be far more convenient than searching for it in a large table.
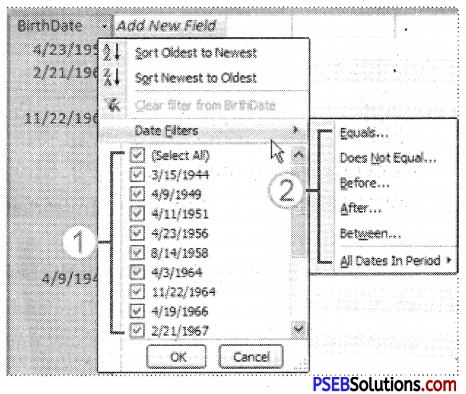
Follow these steps to apply filter:
To create a filter
1. Click the drop-down arrow next to the field you want to filter by.
(A drop-down menu with a checklist will appear. Only checked items will be included in the filtered results. Use the following options to determine which items will be included in your filter)
1. Select and deselect items one at a time by clicking their check boxes.
Here, we will deselect all of the options except for Class .
2. Click Select All to include every item in the filter. Clicking Select All a second time will deselect all items.
2. Click Blank to set the filter to find only the records with no data in the selected field.
Click OK. The filter will be applied.
![]()
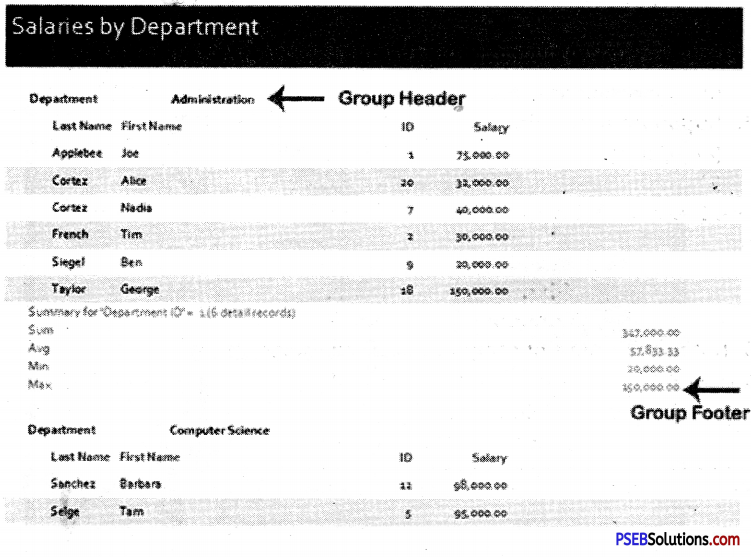
Reports:
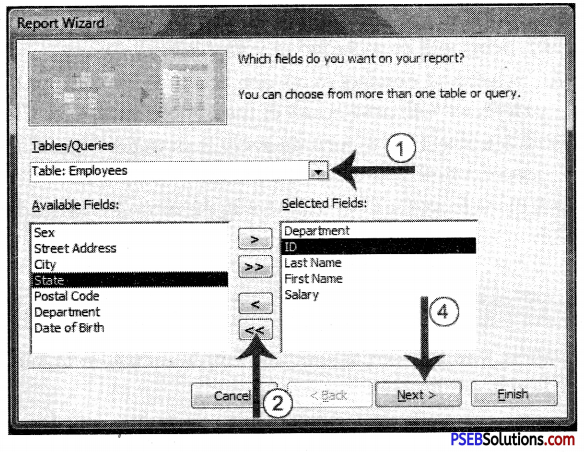
Reports allow you to print assembled data in a custom layout. You can create reports based on tables and/ or queries. There are several methods for creating a report. We will focus on the Reports wizard.
To create a report:
(i) Click on the Create tab and then select Report Wizard from the Reports group.

1. Click on the down arrow beside the Tables/Queries selection window and choose the table or query you’re basing your report on.
2. Add fields – (All the fields from your selected tables/ queries appear in the Available Fields: window.)
1. To add fields to the Selected Fields window, one-at-a-to move all available fields into the Selected Fields window at once.
2. To remove individual fields from Selected Fields, click on each field and press to remove all fields, press
3. When done, click Next.
3. When done, click Next.
(You can select a sort order for up to four fields. Click on the down arrow to select a field and then choose ascending or descending order.)
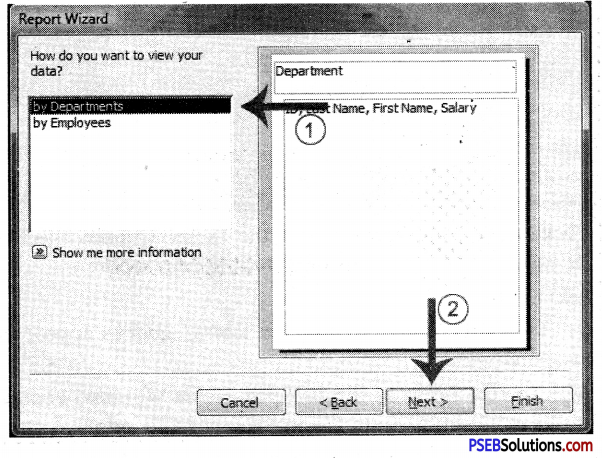
4. When done, click Next and select layout options.
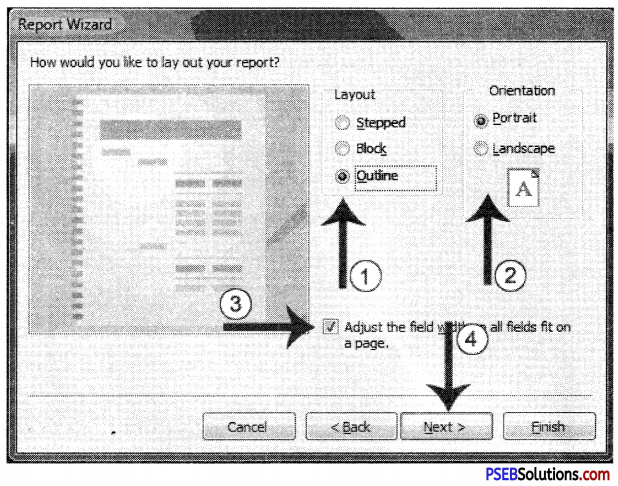
5. Click Next and add title to the form.
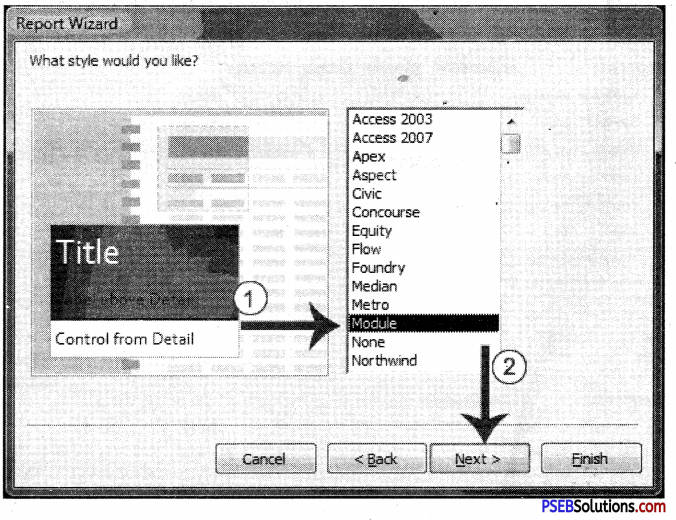
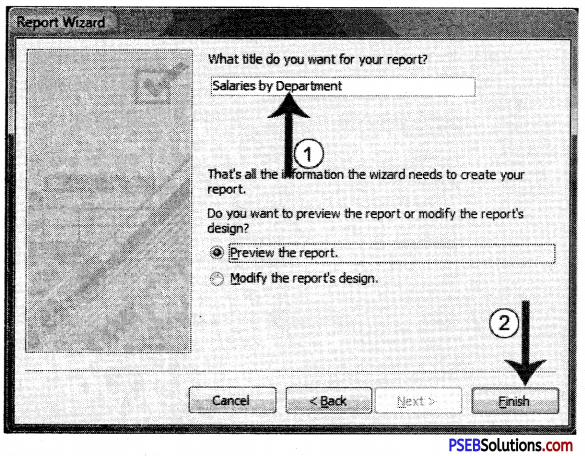
6. Click finish to finish the repeat.