This PSEB 7th Class Computer Notes Chapter 4 Microsoft Word Part-II will help you in revision during exams.
PSEB 7th Class Computer Notes Chapter 4 Microsoft Word Part-II
Introduction:
Sometimes we need to create, design and manage effective documentation. To do this, we need to know how to format a document. Formatting means changing the general arrangement and appearance of the text in a document.
There are three types of text formatting available in MS-Word:
- Character Formatting
- Paragraph Formatting
- Page.
In addition, we need to know how to highlight our document so that readers can easily read all the important parts of the document. MS Word gives us the ability to present our documents in a very efficient way. In this lesson, we will learn about formatting text, inserting pictures, inserting charts, creating objects, word art, clip art and more.
Text Selection
Before applying any type of formatting to text in MS Word or any word processing software we have to select the text so that we can apply the formatting on that selected text. We can select text using the mouse button or the keyboard keys.
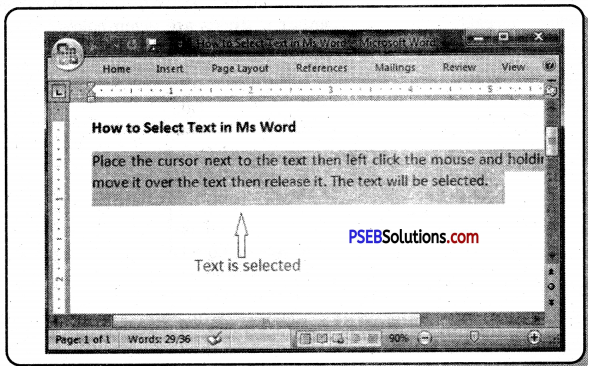
How to Choose Text in MS Word?
Place the cursor in front of the text and then left click on the mouse button, hold it and drag it over the text and then release it. The text will be selected.
- Double click on the word to select the same word.
- To select the entire paragraph, click within the paragraph three times.
- To select the complete document, in the Home tab from the editing group, click Select command and then click the Select All button.
Or
Press Ctrl + A from the keyboard. - Press Shift + Arrow keys from the keyboard; Hold down the Shift key and press the arrow button, Word will select the text in the direction of the arrow button. There are three arrow keys in numeric keypad, so you can select text in three different directions.
Home Tab:
The Home tab is the default tab in Microsoft Word. It consists of five groups of related commands; Clipboard, fonts, paragraphs, styles and editing. It helps you change the document settings like font size, adding bullets, adjusting style and many more common features. This helps you to return to the home section v of the document.
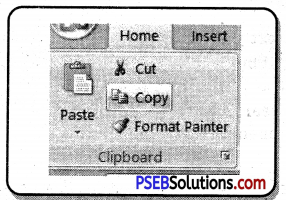
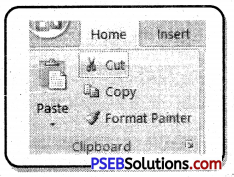
Clipboard Group
The Clipboard group is the first group to the left side of the Home Tab. This group contains four commands such as cut, copy, paste, format printer. It is often used in conjunction with the editing group, to the right of that tab.
In this topic, today we will learn how to cut copy and paste a word or paragraph.
![]()
Copy Paste Options
When we need to retype a word or paragraph in a document, we use the Copy option. Using the Copy option, we save our time and effort. Using the Copy option, you can copy text from one place to another. MS Word offers a variety of ways to copy and paste text.
Some popular methods are given below:
Method 1.
- First select the text you want to copy.
- Click the Home tab and click the Copy command.
- Place the cursor where you want to paste the text.
- Click on the Paste command in the Home tab as shown in the picture above.
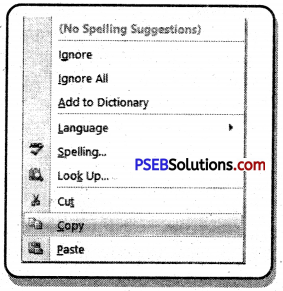
Method 2.
- First select the text you want to copy.
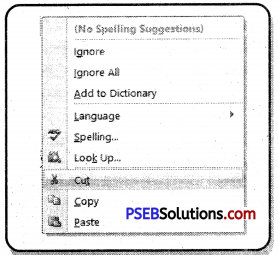
- Hover the cursor over the selected text and right click on the mouse. ignore AH
- A menu will appear; Select the “Copy” option from this.
- Now, move the cursor to the desired position and right click on the mouse.
- A menu will appear; Select the “paste” option from this.
Method 3.
- First select the text you want to copy.
- Now press the Ctrl + C button.
- Now, move the cursor to the desired position and press the Ctrl + V button.
Cut Paste Option
Cut Paste Option means to move the selected text from one place to another. In Microsoft Word, you can cut text from a document and paste that text into ‘another document or anywhere in the same document. After cutting the text, it is stored in the clipboard.
Method 1.
- First select the text you want to cut.
- Click the Home tab and then click the Cut command.
- Place the cursor where you want to paste the text.
- Click on the Paste command in the Home tab as shown in the picture above.
Method 2.
- First select the text you want to cut.
- Now click the right button of the mouse on selected text.
- A menu will appear; select the “Cut” option from this menu.
- Now, move the cursor to the desired position and right click on the mouse.
- A menu will appear; select the “Paste” option.
Method 3.
- First select the text you want to copy.
- Now press the Ctrl + X button.
- Now, move the cursor to the desired position and press the Ctrl + V button.
Format Painter
With the help of Format Painter we can copy the format already applied to the text in our document very easily and without wasting time. Below are the steps for copying text formatting:
Method 1.
- First select the text whose formatting you want to copy.
- Click the Home tab and click the Format Painter command.
- The pointer changes to a paintbrush icon.
- Use the brush and drag it over the text where you want to apply the formatting.
- To cancel formatting, press the Esc key or click on the Format Painter command.
Method 2.
- First select the text whose formatting you want to copy.
- Now press the Ctrl + Shift + C button.
- Click on the text where you want to apply the copied formatting.
- Now press the Ctrl + Shift + V button.
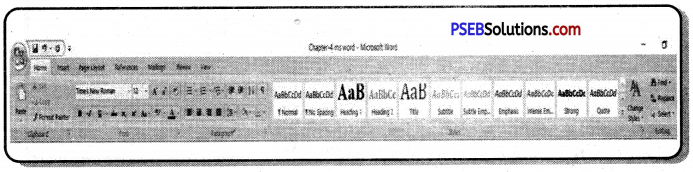
Font Group
Text typed with the help of a typewriter is very simple and black in color, in this text we can neither change the color of the letters nor change its style but MS Word has given us a facility with which we can present our text in a very attractive way, we can change the color, style, size etc. of our text. The Fonts group of the Home tab gives us a number of character formatting commands such as font style, font size, font color, bold, italic, underline.
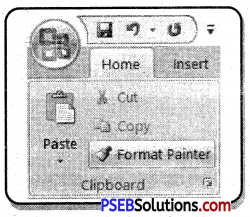
Pressing Ctrl + Shift + F keys will open the Font dialog box on the screen as shown in the picture below:
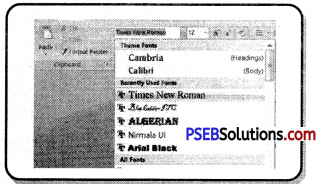
Font Face
Font face is used to change the appearance of the text. Steps to change the font face of the text are as follow:
- Select the text whose font you want to change.
- Select the appropriate font from the Font dialog box as shown in the picture above.
Or - Select the font from the Font drop-down menu in the Font group on the Home tab. Here I have selected the Times New Roman option.
![]()
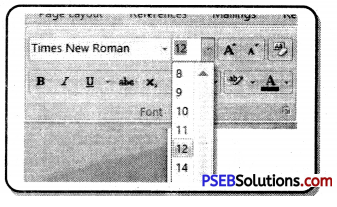
Font Size
To change the size of the text, font side option is used. Steps to change the font size are as follow:
- Select the text whose size you want to change,
- Select the appropriate size from the Font dialog box as shown in the picture above.
Or - Select the size option from the Font drop-down menu in the Font group on the Home tab. Here I have selected the size 12.
Grow Font and Shrink Font
As shown in the picture below, large size A is called Grow Font and small size A is called Shrink Font. With the help of Grow Font we can increase the size of selected text by one size and with the help of Shrink Font we can reduce the size of selected text by one size.

- Select the text whose size you want to increase.
- Click on Grow Font.
Or
Press Ctrl +> Shortcut button on the keyboard: - Select the text whose size you want to decrease.
- Click on the Shrink font.
Or
Press Ctrl + < Shortcut button on the keyboard.
Font Style
Word processor software uses three basic font styles for text, these are as follows:
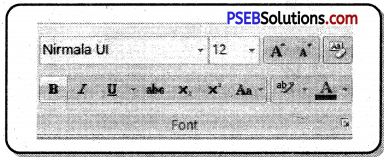
- Bold: If you want to thicken the text in your document, the Bold (B) option will be used. To do this, first select the text and then press the B button from the Font group. Or press the Ctrl + B Shortcut button on the keyboard.
- Italic: If you want to italicize the text in your document, the Italic (I) option will be used. To do this, first select the text and then click the I button from the Font group. Or press the Ctrl + I Shortcut button on the keyboard.
- Underline: If you want to underline the text in your document, the underline (U) option will be used. To do this, first select the text and then click the U button from the Font group. Or press the Ctrl + U Shortcut button on the keyboard.
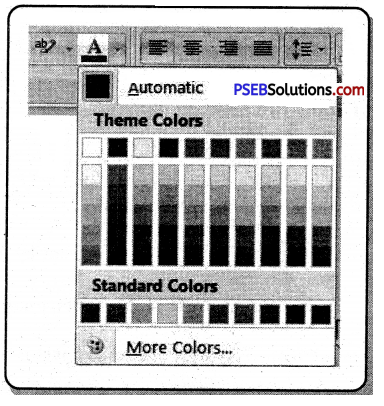
Font Color:
If you want to change the color of a word or paragraph in your document, you must select a font color for this purpose. Here are the steps to change the color of the text.
- Select the text you want to change color.
- Select the appropriate color from the Font dialog box as shown in the picture above.
Or - Select the text you want to change the color.
- Click on the Font Color option from the Font group as shown in the picture below. Now a pull down menu will open.
- Choose your favorite color from this menu. Now your text will change to that color.
Text Highlight Color:
Just as we can highlight a word or a sentence in our written document with the help of a pen, we can highlight our text with any color in MS Word.
- Select the text you want to highlight.
- Click on the Text Highlight

option from the Fonts group. Now a pull down menu will open. - Now choose your favorite color from this menu. Your text will be highlighted in that color.
Clear Formatting:

This option works to remove the formatting applied to the text
document. For this, select the text whose formatting you want to delete, and then click Clear Formatting from the Home tab.
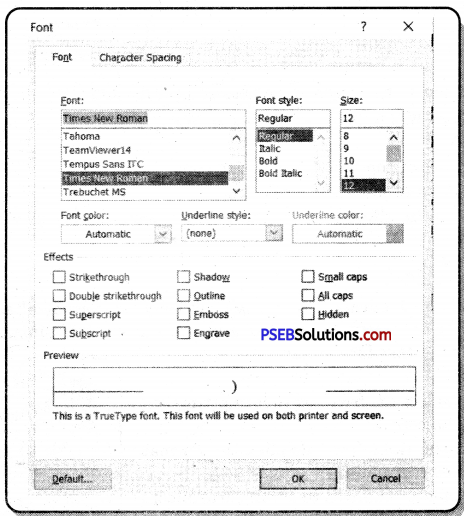
Change Text Case:
(а) Sentence case: It capitalizes the first letter of each sentence.
(b) Lowercase: It changes the text from uppercase to lowercase.
(c) Uppercase-: It capitalizes all the all letters of your text.
(d) Capitalize Each Word: It capitalizes the first letter of each word.
(e) Toggle Case: It allows you to Shift between two case views, e.g. to Shift between Capitalize Each Word and cAPITALIZE eACH wORD.
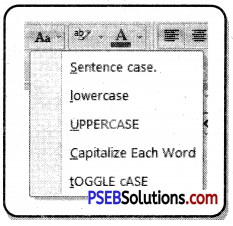
You can easily change the text case in your document by follow these steps:
- Select the text you want to change.
- Click on the change case option from the Fonts group. Now a pull down menu will open.
- Select the desired case. Your text will be change in that case.
![]()
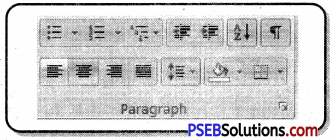
Paragraph Group
The paragraph group provides options related to the setting of the paragraph. Such as alignment, bullet, numbering, line and paragraph spacing etc.
Click on the Show / Hide button to show paragraph symbols and other hidden formatting symbols. Or press the (Ctrl + *) button from the keyboard.
Alignment
You can change the text alignment in your document to make it more presentable and readable.
There are four types of alignments available in the paragraph group which is as follows:
- Align Text Left (Ctrl + L): Aligns the selected text with the left margin.
- Align Text Right (Ctrl + R): Aligns the selected text with the right margin.
- Center (Ctrl + E): This aligns the selected text to the center within the margin.
- Justify (Ctrl + J): Aligns text to both left and right margins, adding extra space between words as necessary.
Here are the steps to change the alignment:
- Select the text.
- Click the appropriate alignment button from the Paragraph group of the Home tab.
Bullets and Numbers
Bullets or numbers are used to create a list in a document or to convert typed text into a list. Here are the steps to add bullets and numbers to a list:
- Place the cursor where you want to insert the bullet/number.
- If you want to insert a bullet, click on the Bullet option in the paragraph group and if you want to insert a number, click on the Number button.
- If you want more bullets/numbers style options, click on the arrow to the right of the bullet/number command. This will open the drop down menu.
- Now select any bullet/number style that you want to add from this list.
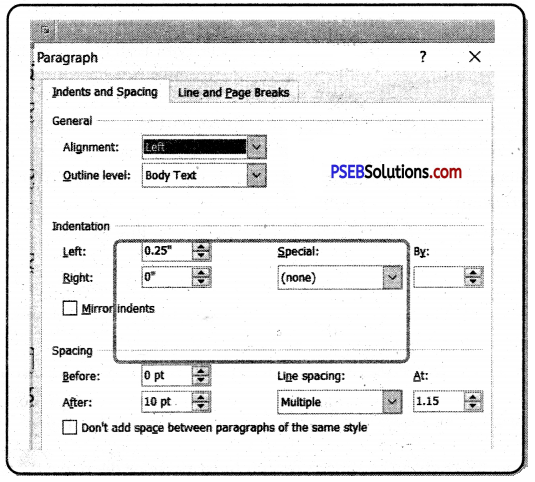
Paragraph Indenting:
Indenting a paragraph allows you to set text within a paragraph at different margins. There are several options for indenting:
- First Line: This option controls the left limit for the first line of the paragraph.
- Hanging: Controls the left boundary of each line in a paragraph except the first line.
- Left: Controls the left border for each line in a paragraph.
- Right: Controls the right limit for each line in a paragraph.
To indent paragraphs, you can follow the steps below :
- Place the cursor where you want to increase or decrease the indent.
- Click on the indent

buttons to control the indent - Repeatedly click the indent button to increase or decrease the size of the indent.
Line Spacing Adjustment
Line spacing represents the vertical distance between lines within a paragraph and determines the position of each line corresponding to the line above it. By default the line spacing is 1.15. You can increase or decrease the spacing between lines from the Paragraph dialog box. The line spacing drop-down menu includes two options, Add Space Before Paragraph and Add Space After Paragraph, this option adds a line of space above paragraph and below paragraph. Adding space will be removed by clicking this option again.
You can change the space between lines and paragraphs by following the steps below:
- Select the paragraph you want to change.
- On the Home tab, click the Paragraph dialog box launcher.
- Click the Indents and Spacing tab from the paragraph dialog box.
- In the Spacing section, adjust the space according to your needs.
Click on the line spacing button in the paragraph group as

and click on the required option from the drop down menu.
Or
To add single line space press (Ctrl +1), to add double line space press (Ctrl + 2) and to add 1.5 line space press (Ctrl + 5).
Borders and Shading
You can add borders and shading to paragraphs and full pages.
1. Shading: This option is used to color the background of the paragraph or selected text.
2. Border: This option is used to customize the border of the selected cell or text.

If you want to apply a border/shading to a paragraph or an entire page, first select the paragraph or page, then click the Borders or Settings button. For more border/shading options, click the small arrow next to it.
![]()
Style Group
You can create professional and presentable documents in MS Word by applying different styles. Changing the style of text can make your document look amazing as well as prepare your document for a table of contents page. You have several choices to choose from.
To use Quick Styles:
- Select the text you want to format.
- Click the Styles group next to the Home tab dialog box.
- Click the style you want to apply.

To see all options, click the dialog box launcher in the lower right corner of the Styles section.
Editing Group
The edit group actually appears at the far right of the Home tab. There are three options in this group which are as follows:
- Find (Ctrl + F): If you want to find a particular word or phrase in a document or an entire page, you can use the “Find” option.
- Replace (Ctrl + H): You can use this option if you want to delete any word and insert new word in that position.
- Select: This option is used to select a document .There are three different options for selection, which are as ahead:
(а) Select All (Ctrl + A): This option allows us to select the entire document.
(b) Select Object: This option allows you to select one or more objects, (c) Select Text with Similar Formatting: This option allows us to select words with similar formatting. - GoTo (Ctrl + G): With the help of this command, we can easily reach a specific place in the document. Such as pages, sections, bookmarks, footnotes, end notes, etc.
Finding Words:
If you want to search for a word in a document follow these steps :
- Click the Find option from the Editing group on the Home tab.
- Type the words in the Find What box as shown below and click on the Find Next option.
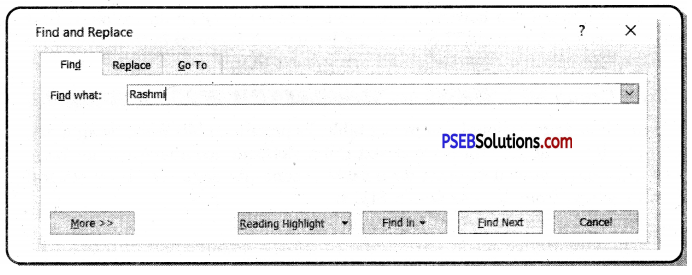
Replacing Words:
To replace a word or more in a document follow these steps:
Click the Replace button from the Editing group on home Tab. The Find and Replace dialog box will display.
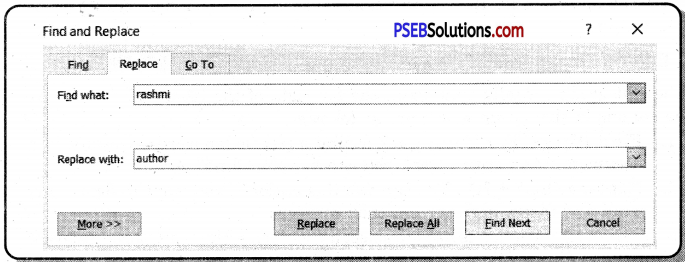
- Type the word you want to change in the Find What box as shown.
- In the Replace With box, type the word with which you want to replace the old word.
- Click on the Find Next option.
You can use the Ctrl + F keys to find words and the Ctrl + H shortcut keys to replace words.
Insert Tab
This tab contains all the commands for inserting items into your documents like Pages, Tables, Links, Header and Footer, Text, Symbols are all insert tab options.
Pages
There are 3 options in the page group as shown in the picture below:
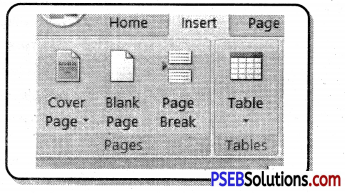
1. Cover Page: This button can be used to insert a pre-formatted cover page for a document. The information displayed on the page is filled in after the page is created.
Steps to add a Cover Page :
(a) From the Insert Tab, in the Pages group, click the Cover Page button.
(b) Select the cover page of your choice.
(c) Add in important information by editing the text that displays on the cover page.
2. Blank Page: This option is used to insert a new blank page into a document at the cursor position. If you want to add a new page anywhere in your document, click on the Blank Page option in the Page group from the Insert tab.
3. Page Break: This option is used to delete a page at the current cursor position and start a new page. In simple words we can say that it divides the page into two parts. For Page Break, click on the Page Break option from the Page group or use the Ctrl + return keys.
Tables Group
This button is used to insert a table into the document. With this option, you can create a table or row or column in the document. Or you can set the rows and columns of the table as your wish. In MS Word you can easily convert text to table.
Here are the steps to insert a table:
- Place the cursor where you want to place the table.
- Click the Table button from the tables group in the Insert tab. A dropdown table grid will open.
- Click and drag over the small boxes to determine the number of columns and rows for your table.
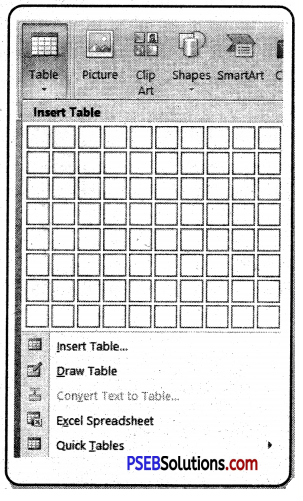
According to Insert Table dropdown menu we have three more options to insert a table into the document.
- Insert Table: You can click the Insert Table menu item to type in the number of columns and rows.
- Draw Table: Click the Draw Table button to use a pencil tool to draw cells of a table.
- Quick Table: By clicking on the Quick Tables option, we get a list of different table designs. You can choose any design of your choice for the table.
Illustrations Group
This group allows us to add photos, clip art, shapes, smart art, etc. in our document.
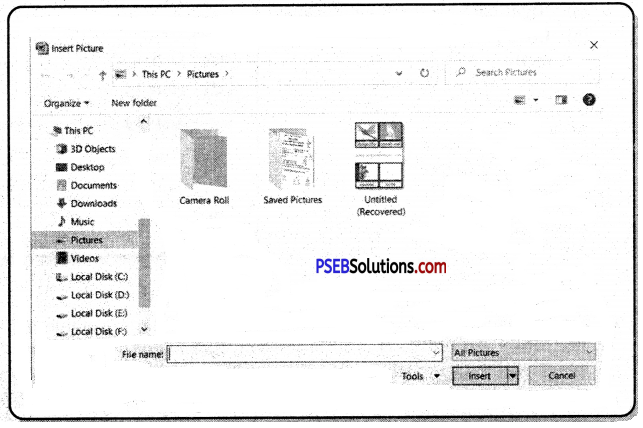
1. Pictures: This option is used to insert photos into your document. Here are the steps to insert pictures into the document:
(a) Place the cursor where you want to insert the image.
(b) In the Insert tab, click on the Picture option from the Illustrations tab.
(c) The Insert Picture dialog box will open.
(d) From this dialog box, click the image you want to insert.
(e) Click on the Insert button.
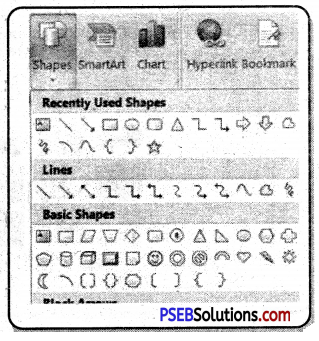
2. Shapes: This button is used to insert the shapes such as circles, squares, arrows and triangles into a document, When the button is clicked. Here are the steps to insert the shape:
(а) In the Insert tab, click on the Shapes option from the Illustrations tab.
(b) A gallery of different shapes will appear.
(c) Click the desired shape and then drag the shape into the document.
If you want to write something in the drawn shape, here are the steps:
(a) Right click on the drawn shape.
(b) Click Add Text from the pop-up menu.
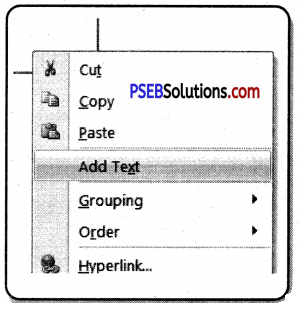
You are now able to type the text in your Shape.
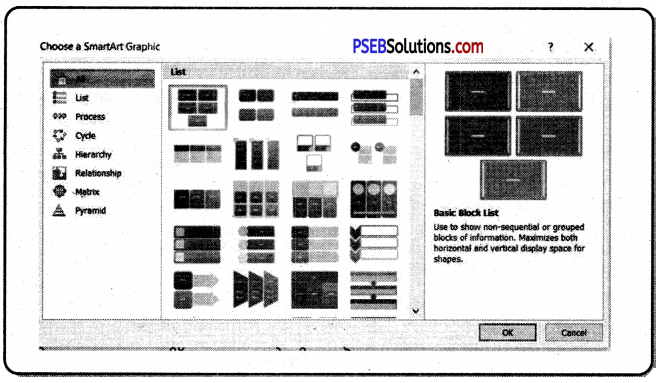
3. Smart Art: Smart Art graphics are visual representations of information. The Smart Art option is used to present information in the form of an image easily and quickly. This option offers many different layouts to effectively communicate your message or ideas. The steps to add smart art graphics are given below:
(а) On the Insert tab, in the Illustration group, click Smart Art.
(b) In the Choose a Smart Art Graphic dialog box, choose the layout you want to insert.
(c) Click the Ok button to insert your Smart Art graphic.
1. Click the Text Pane from the Create Graphic group in the Design Tab.
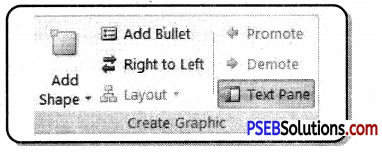
2. Type your text in the Type your text here box.
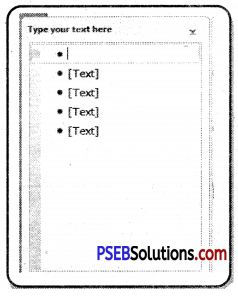
In the Smart Art Graphic, click the [Text] box and then type your text. For best results, use this option after you have added all the boxes.
Charts
Use this feature to insert a bar, area or line chart in a document. Steps to insert the chart are as follow:
- From the Insert tab, in the illustrations group, select Chart button.
- From the pull down menu, select the chart design you would like to use and then click Ok.
![]()
Clip Art
Clip art refers to a graphic or a picture that you can insert in your document. It comes in different formats and styles. It is used to enhance the appearance of a document. The steps to insert a clip art are given below:
- Place the cursor where you want to insert the clip art.
- From the Insert tab in Illustrations group click the Clip Art button.
- A task pane appears on the right side of document.
- Enter the keyword in ‘Search for’ field and select the suitable option in ‘Search in’ and ‘Results should be’ fields.
- Click Go, clip art menu will appear.
- Select the desired clip art.
Header & Footer
Header and Footer are parts of a document that contain specific information such as page number and total number of pages, title of the document, company logo, any photo, etc. A header appears at the top of each page and footer appears at the bottom of each page.
To insert the header and footer in your document steps are as follows:
1. From the Insert tab, click the Header / Footer option from the Header & Footer group.
2.Now a drop down menu of pre-design heading styles will open, from this menu you can choose any style as per your need.
3. Similarly clicking on the Footer option will open the already created Footers design and you can choose any design as per your need.

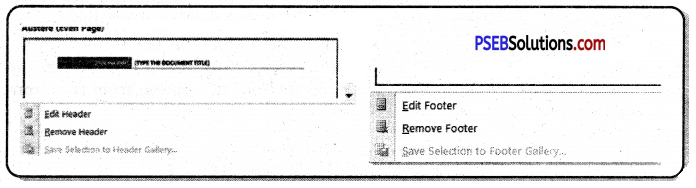
4. Now click on Edit Header or Edit Footer from the Header or Footer drop down menu.
5. Now you can edit the header/footer of your document.
6. Click the Close Header and Footer button to exit edit mode.
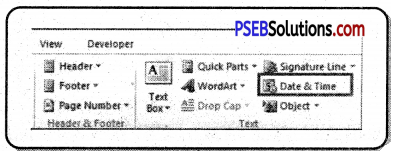
Insert Date and Time in Header/Footer
To insert the date or time in the header or footer, follow the instructions below:
- From the Insert tab, click the Date & Time option in the Text group.
- A Date & Time dialog box will open.
- Select the date format from the‘Available Format’list.
- Choose your desired language.
- Click the Update Automatically check box.
- Click the OK button at the bottom of the dialog box.
Removing Headers and Footers
The steps for removing headers and footers are as follows:
- From the Insert tab, click the Header/Footer command from the Header & Footer group.
- Now the drop down menu will open, from this menu you can click on Remove Header/Remove Footer option.
Page Number
MS Word automatically places a page number on top of each page and place it in the title, footer or sidebar. We can use the “Format page number” option to assign different numbers to these pages with the help of MS Word. Page number drop-down commands include: top of page, bottom of page, page margin, current position, format page number and delete page number.
1. Top of Page: If you want to put a number at the top of your page, click on the Page Number option from the Header & Footer group of the Insert tab and click on the Top of Page option from the drop-down list.
2. Bottom of Page: If you want to enter the number at the bottom of your page, click on the Page Number option from the Header & Footer group of the Insert tab and click on the Bottom of Page option from the drop¬down list.
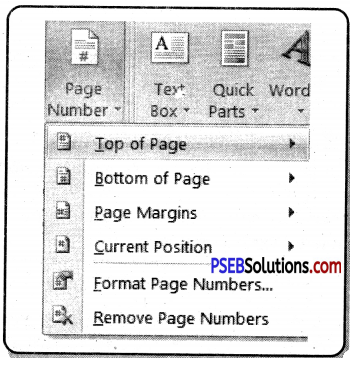
3. Current Position: If you want to enter the page number on the position of your cursor, click on the Page Number option from the Header & Footer group of the Insert tab and click on the Current Position option from the drop-down list.
4. Remove Page Number: If you want to delete the previously entered page number, click on the Page Number option from the Header & Footer group of the Insert tab and click on the Remove Page Number option from the drop-down list.
Text Group:
The following options are available in the text group:
- Text: Text boxes are used to highlight text in a document.
- Quick Parts: Click this button to insert pre-formatted text, auto-text, document properties and fields into a document. Several different types of Quick Parts are available. It is also possible to create customized Quick Parts to use later in documents.
- Word Art: To insert decorative text into a document, click this button.
- Drop Caps: Drop Caps wrere used to create a capital character at the beginning of a paragraph. When this button is clicked, three options for drop caps will be displayed.
Hover the mouse over one edge of the text box. Mouse pointer will turn into a cross with arrows.

Click, hold and drag the text box to the desired location.
Resize Text Boxes
- Click on the text box you want to resize.
- Click, hold and drag the two-sided arrow-shaped handle on the corners or sides of the text box until it is the desired size.
Word Art
Word Art is designed to allow you make your text more attractive; you can format your text to make it look like a picture or 3D art and enhance its appearance in different ways. The steps to insert Word Art are given below:
- Select the text you want to change.
- Then click on the Insert tab.
- Click on the WordArt drop-down arrow in the Text group.
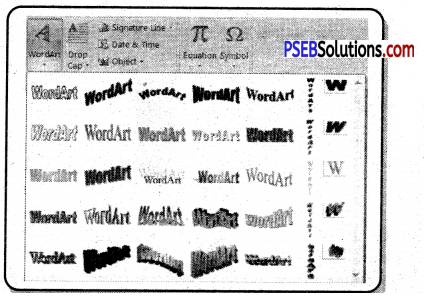
- A drop-down menu of WordArt style will appear. Click the style you want to use.
- Word will automatically create a text box for the text.
- Now click Ok button, the text will appear in the selected style.
Add Drop Cap Text
- Select a paragraph from your document.
- From the Insert Tab, in the Text group, click Drop Cap.
- Select the Drop Cap option of your choice from the menu.
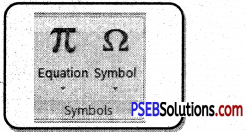
Symbols Group.
Two buttons allow you to add special typing to your document. These buttons are Equation and symbols.
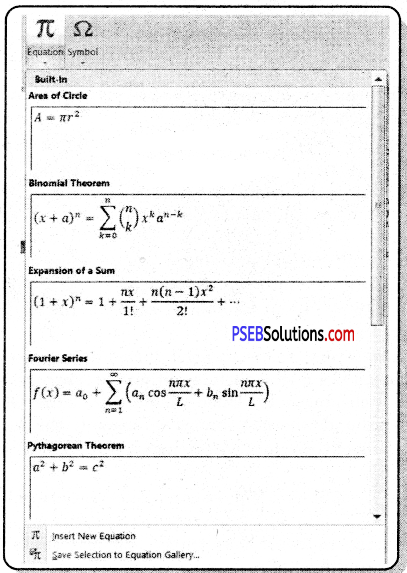
1. Equation: This button is used to insert a mathematical equation into a document. The equation tools ribbon will appear when the button is clicked. This ribbon is used to create the equation. A list of common equations is also available.
You can add it to your document by clicking on the equation you need from the Built-In Equation list as shown in the picture below:
Or
Click “Insert New Equation.” You will see a new “Equation Tools” Ribbon tab, giving you the option to create your own equation from scratch.
2. Symbols: The Symbols tool allows you to type characters that are not often found on the keyboard. This button is used for inclusion in copyright or trademark documents.
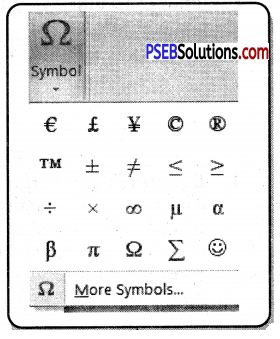
Click on the button to see some recently used symbols:
- Place your cursor where you want to add the symbol.
- From the Insert Tab, in the Symbols Group, click Symbol button.
- Select the symbol of your choice from the available options.
- If you don’t find the symbol at first, click the More Symbols option and select from the choices made available.
![]()
Note:
- Formatting means changing the general arrangement and appearance of the text in a document.
- There are three types of text formatting available in MS-Word:
- Character Formatting
- Paragraph Formatting
- Page.
- The Home tab is the default tab in Microsoft Word which consists of five groups of related commands; Clipboard, fonts, paragraphs, styles and editing.
- The Fonts group of the Home tab gives us a number of character formatting commands such as font style, font size, font color, bold, italic, underline.
- With the help of Format Painter we can copy the format already applied to the text in our document.
- We can also reverse the work done during editing using undo command. If we have made a mistake while editing the text in the document, we can correct it by clicking on the Undo command from the “Quick access” toolbar and this will undo the last change we made to the document,
- With the help of Grow font we can increase the size of selected text by one size.
- With the help of Shrink font we can reduce the size of selected text by one size.
- Word processor software uses three basic font styles for text, these are Bold, Italic and Underline.
- Clear Formatting option is used to remove the formatting applied to the text document.
- There are four types of text alignments available in the paragraph group, which are Align Text Left, Align Text Right, Center and Justify.
- Bullets or numbers are used to create a list in a document or to convert typed text into a list.
- To find a particular word or phrase in a document the “Find” option is used.
- If you want to delete any word and insert new word in that position, use Replace option.
- “Select Text with similar Formatting” option allows us to select words with similar formatting.
- Insert tab contains all the commands for inserting items into your documents like Pages, Tables, Links, Header and Footer, Text, Symbols etc.
- With the help of “Draw Table” button, we use a pencil tool to draw cells of a table.
- Page Break option is used to delete a page at the current cursor position and start a new page.
- Clip art refers to a graphic or a picture that you can insert in your document.
- Header arid Footer are parts of a document that contain specific information such as page number and total number of pages, title of the document, company logo, any photo, etc.
- A header appears at the top of each page, and footer appears at the bottom of each page.
- Text boxes are used to highlight text in a document.