This PSEB 6th Class Computer Notes Chapter 3 Basics of Working with Computers will help you in revision during exams.
PSEB 6th Class Computer Notes Chapter 3 Basics of Working with Computers
Introduction
A computer is a combination of hardware and software. We can say that a computer is a machine in itself. There are always some rules which should be followed to work with a machine. Similarly if the user has to work with a computer he must have basic knowledge of working, with computers.
Operating System
Operating system is a system software without which a computer cannot work. IT acts as an interface between the hardware and the user. Each computer has an operating system installed on it. Operating system is displayed in the form of screens, menus, dialogue box, icons and widgets etc.
Definition of Operating System
- An operating system is an interface between a computer user and computer hardware. It makes computer hardware work by controlling all the internal processes of the computer.
- There are many types of operating systems. Each operating system is developed for different types of machines. Each operating system has a different set of commands and it understands the machine architecture very well.
Windows
Windows is an operating system developed by Microsoft. It is a graphical user interface. It means it is easy to work with pointing devices such as mice in windows. Most of the computers in this world are using windows operating systems. Everything is displayed in a rectangular frame on the screen in this operating system. That is why operating system is named as windows. It is the most popular operating system in the world.
DOS
DOS stands for Disc Operating System. This operating system is also developed by Microsoft. It is a character user interface operating system. This operating system is not very powerful. The user types commands to instruct the computer. This operating system was used on computers with small memory and low speed hardware. The user has to remember a lot of commands to work in it. That is why it was difficult to work in this operating system. Also the user cannot do a variety of work simultaneously in this operating system.
Android
The Android Operating System is one of the latest operating systems in digital word. It is the operating system which is used in mobile phones. This operating system was developed by Google. This operating system is developed for devices which have touchscreen in them. It provides a very beautiful and convenient interface which can be used by finger touch. The user can do the tasks like pinching, swiping and typing. Now the Android operating system is also used in televisions, cars , wrist watches and many other digital devices. Each of these devices have different user interfaces.
![]()
Starting Computer System
The first task to work with an operating system is to make it work. This process is called starting the computer system. To start a computer system is not a difficult task. It is as simple as to start any other machine.
Powering on the Computer System
To start a computer it must be switched on first. Each computer system has a power button on its system case. The user has to press that power button to switch on the computer system. Similarly there is a power button on the monitor also. If the monitor is not powered on then the user has to switch on the monitor.
After switching on the computer, the computer starts to place the operating system in its memory. This process is known as booting. This process takes some time depending on the memory and the hardware attached to the computer system. After the booting process screen is displayed on the monitor.
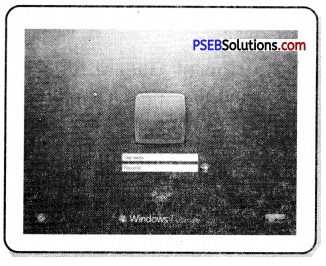
Logging-in
After the booting process the initial windows screen is displayed. This screen provides the opportunity for the user to connect to the main operating system. This process is known as login.
On the screen all the users are displayed which are created on this computer. To login to the screen the user must know who is username and password.
- To Login to the computer , click on the username.
- Windows will ask to enter the password for you.
- Type in the password of that username.
- Windows will let you in.
- It will display the next screen which is called desktop.
Desktop and its Components
When the user logged into the Windows operating system, he is taken to a screen. This screen is known as the desktop of the computer. It is basically a dashboard of a computer system. All the operations are performed from this screen on. It has various parts. The parts of a desktop are discussed below.
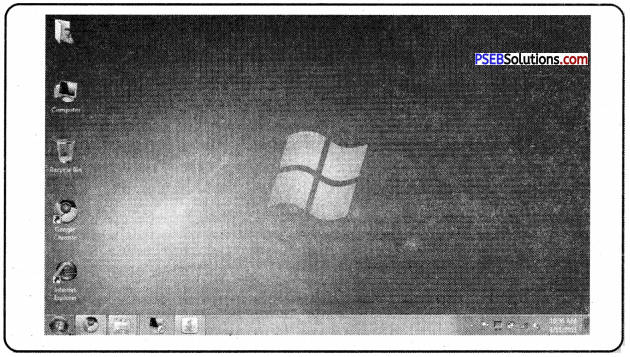
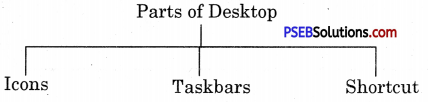
Desktop
Desktop has following three parts:
- Icons
- Taskbar
- Shortcut
Icons
Icons are the small pictures on the desktop. These icons represent a file or a program or folder on the computer. The user has to click on this icon to open.dat file or program. The following types of icons are available on Windows desktop.

1. My Computer: This icon is used to assess the hard disc of the computer. This icon opens a window on the computer screen which displays all the hard disks attached to the computer and other removable media such as pen drives or CDs. The user can work in this window.
2. Network: This icon is used to connect to the network location attached to this computer system. This icon is used when the computer is connected to a local area. This icon displays icons of all the computer systems which are connected to users’ computers through Local area networks. The user can go to the other computer and work on files.
3. Recycle Bin: Recycle Bin is a folder which works like a dustbin. In this folder contains all the deleted files, folder, icons on the computer. When anything is not required on the computer system the user can delete that item. That item is shifted to the recycle bin folder. If the user deletes an item accidentally he can restore that item from the recycle bin.
4. Users File: This icon is used to assess the current user data. Thus it can hold all the default locations for the different types of files. It may include my documents, my pictures, my videos desktop etc. The name of this icon changes as per the user logged in.
![]()
Shortcuts
A shortcut is to reach the original file. A shortcut represents a link to the program file folder or any other item on the computer. It is an easy way to assess that item. The program can be opened using that shortcut. If the shortcut is deleted then the original program is not deleted or removed from the computer system. The user can create many shortcuts for a single program or file. The shortcut icon is identified by a small Arrow on a normal icon.

Shortcut
Wallpaper
Wallpaper is an image which is displayed behind the desktop screen. It is also called a desktop background. The user can place a screen as per his requirement. This screen can be a picture colour or pattern. There are some preloaded wallpapers available in the Windows operating system. The user can change the wallpaper as per his requirement.
The following steps are used to change a wallpaper.
- Right-click on wallpaper displaying on Desktop.
- Choose the “Personalize” option from the popup menu.
- A new window will appear.
- Select the required theme from the window. We can alternatively click on the “Desktop wallpaper” option from the bottom and choose the wallpaper.
Taskbar
Taskbar is located at the bottom of the screen. This bar is a part of the Operating System. It allows us to start a program using the Start menu. This bar always remains visible during working in any application. We can navigate through Active programs using the taskbar. The area on the right side of the taskbar is called “Notification Area”. This area allows us to check date and time, items running in the background etc. The taskbar was first introduced with Microsoft Windows 95 and is found in all subsequent versions of Windows. We can have a look of taskbar and it’s all parts as under:
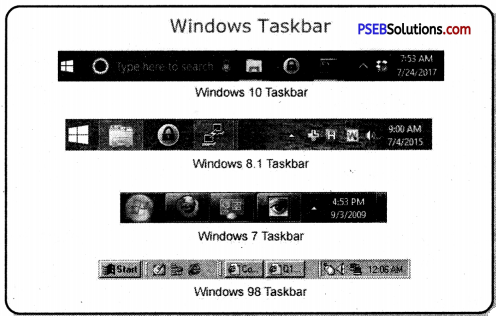
Taskbar
All these parts of the taskbar are having their own functions. Let’s discuss the use of each one of them. It has a logo of windows on it. It is the first item on Taskbar.
Its icon is:
- Start Button: We can start any application and program with the help of the Start button.
- Quick Launch Bar: This section of the taskbar enables us to launch
programs without locating them from the Start menu. It is located next to the Start button. - System Tray: It is located at the right side of Taskbar. It contains miniature icons for easy access to system functions such as fax, printer, modem, volume etc.
- Notification Area: This area is a part of the taskbar that provides notifications and status of devices. It can also be used to display icons for system and program features that are not on the desktop.
- Clock: At the end of taskbar, Clock is displayed where Current Time and Date can be seen. We can change Time and Date by clicking on it. It requires Administration access to change the Time or Date.
- Active Programs: This area of taskbar is between quick access bar and System Tray area. In this area of taskbar, all the active programs appeared as an icon and we can easily navigate among them.
Working with Windows Applications
Microsoft Windows 7 provides some of the inbuilt applications which are used for different purposes. These applications are the most basic applications and each one is of a different type. Let’s discuss some of these applications.
Notepad
This is a basic text editor of Microsoft Windows. This is mainly used to type character data. It is the most simple application for creating files with text data only. This application is mainly used for writing codes (Source Files) of programming languages like HTML, Java etc.
Running Notepad
- Start → All Programs → Accessories → Notepad
Or - Click on the start button and type “Notepad ” in the search bar. Click the Icon from the list and press enter key.
Wordpad
This is a Rich Text Format word processor. We can create a document with formatting using this application. This application can be used to write letters or to create documents with texts data only. Graphics like charts, pictures, clip-art etc. cannot be inserted in it.
Running WordPad
- Start → All Programs → Accessories → WordPad
Or - Click on the start button and type “WordPad” in the search bar. Click the Icon from the list and press enter key.
Paint
This is inbuilt graphical applications of Microsoft Windows 7. We can create drawing or other basic graphical objects using this application. It is also known as MS Paint. MS Paint has several tools for drawing and colouring. We can edit an existing picture also using this application.
Running Paint
- Start → All Programs → Accessories → Paint
Or - Click on the start button and type “Paint” in the search bar. Click the Icon from the list and press enter key.
Calculator
This application of Microsoft Windows 7 is used to do calculation related work. We can use this application as we use a real calculator. Its layout and buttons are also similar to real calculators. We can perform calculations up to 16 digits using this application.
Running Calculator
- Start → All Programs → Accessories → Calculator
Or - Click on the start button and type “Calculator” in the search bar. Click the Icon from the list and press enter key.
Using Run Box
Run box allows the user to open a program by name. This option of windows is very useful for fast opening of programs. Instead of navigating through menus, we can directly type the name of the program to run. Each program exists in the computer’ as an executable file. For example, MS Paint is named as “pbrush”, Notepad as “notepad”, WordPad as “Wordpad” and Calculator as “Calc”. We must write the correct name of that program which is to start. We can also start any file by typing it’s full path. The picture below shows how the Run box looks like in Microsoft Windows 7.
To open the Run Box in microsoft windows 7, we can use the following steps:
Press Window

button + R together.
Or
Click on the start button and search for “Run”. Click the Icon from the list and press enter key.
![]()
Search Box of Start Menu
We can use the Search Box of Microsoft Windows 7 to search files or programs of computers. It can find given file from hard drive. It is located at the bottom of Start Menu of Windows 7. If this bar is missing from the start menu then we can re-enable it from Control Panel. The Search Box of start menu looks as given in the picture bellow.
If this part of start menu is missing then we can use following steps to show Search Box.
Steps to show “Search Box”
- Open the Start menu and click “Control Panel.”
- Click “Uninstall A Program” under Programs.
- Click “Turn Windows features on or off.”
- Click on the checkbox named ‘Window Search”.
- Click “OK” to save your changes.
- Search Box will start showing in Start Menu after restarting your computer.
Shutting Down Computer System
When the user completes its work on the computer system it is necessary to shut it down. The process of shutting down a computer system is as simple as starting it. All the tasks are performed by the computer system itself to shut it down. The user has only to start the procedure. Shutting down a computer is necessary to avoid the data loss. When the computer is in workable condition many files have been opened by it. The process of shutting down closes all those files, saving their data and returning them back to their inactive state.
Windows have given commands to shutdown the computer system. These commands are selected from the start menu of the window.
Following steps are used to shutdown a window based computer.
- Click on the start button.
- Click on the arrow available with the shutdown button.
- It will display many options such as sleep shutdown log of restart lock switch user.
- Window will start the process as per the options selected.
The detail of these options are given below:
Sleep:
This option of Power Off menu can be used when we want to leave a computer for some time. During this mode, the power of Monitor/LCD gets OFF and all your data is kept safe. When we put a computer into sleep mode then its power remains ON and its power light starts blinking. This blinking Red-Colour LED on the CPU shows that the computer is in sleep Mode. We can press the power button to resume the computer from this mode.
Shut Down:
This option of Power menu can be used when we have finished all our work. When we shut-down a computer, all parts of computer systems are turned off and no power remains active in the Computer System. We can switch off the main power-supply of the computer when it is shut down. This process can take some time and we must wait till it is over. This process may take time according to the size of data being used and number of programs currently running.
Log Off:
Windows 7 allows us to access a computer differently among users. We can keep our data secure from other users with the help of user accounts in it. If we have finished our work and want to leave a computer but another user is there to access the same computer for own work in a different user account then we can use the Log-off option of Power Menu.
Restart:
This option of power menu can be used when any new program is installed or any updation in the system is done. Sometimes when a new device or hardware is attached to the computer, it is required to restart our computer. In such a case, we can use the restart option of the Power menu to shut down our computer and start it again. When the restart button is pressed then the computer automatically gets started after being shut-down.