This PSEB 10th Class Computer Notes Chapter 7 Microsoft Publishers-I will help you in revision during exams.
PSEB 10th Class Computer Notes Chapter 7 Microsoft Publishers-I
Microsoft Publisher is a desktop publishing application from Microsoft. It is an entry-level application, differing from Microsoft Word in that the emphasis is placed on page layout and design rather than text composition and proofing. The current version is Microsoft Publisher 2010 for Windows, there is no version for other operating systems like Linux and Unix.
![]()
Microsoft Publisher:
Microsoft Publisher is differing from Microsoft Word in that the emphasis is placed on page layout and design rather than text composition and proofing.
Microsoft Publisher is a business desktop publishing program that enables users to easily create professional-looking marketing materials. The Microsoft Publisher offers more design options with over 2,000 professionally designed publication templates and hundreds of design elements for users to mix and match within their publications.
A flexible wizard model allows users to work the way they want, and automated design expertise helps them achieve professional results without design expertise. Stronger office integration and a complete print-to-web publishing solution enable users to deliver professional-looking results.
Differences between Word and Publisher:
The differences in Word and Publisher are as follows:
| Word | Publisher |
| 1. Word is an example of Word Processing Software | 1. Publisher is an example of DTP software |
| 2. Word Document has extension .doc | 2. Publisher document has extension of .pub |
| 3. Word is mostly used of common typing purpose | 3. Publisher is used for designing professional objects. |
How to Start Publisher:
Microsoft Publisher is a great tool to create posters for personal or professional events.
![]()
Creating a Publication:
We can create new publication by following methods:
- By using blank layout.
- By using installed templates.
- By using online templates.
Creating a publication using blank layout:
Following are the steps to start with a blank publication:
- Click the File menu, and then click New.
- Under Available Templates, click a blank publication template, and then click Create.
- Now, we can create a publication with our own specifications in publication. We can also add the objects to the blank layout like text, picture, word art, and auto shapes etc.
- After creating publication, save the publication by clicking on save option in File menu. The Save As dialog box appears, type a name for bur publication, select the folder in which you want to save it, and then click save button. The publication is saved with a .pub extension.
- Close the publication by clicking close button in File menu. A dialog box appears, if we want to save the changes, then click yes button, otherwise click no.
- Before exiting Publisher, we should close all the publications, then Click Exit in File menu or click cross button on title bar.
Components of publisher window:
There are three most important components that we should remember as we work within Publisher 2010. These are:

![]()
Components of Publisher Window:
1. Quick Access Toolbar:
The quick access toolbar is a customizable toolbar that contains commands that we may want to use. We can place the quick access toolbar above or below the ribbon. To change the location of the quick access toolbar, click on the arrow at the end of the toolbar and click Show below the Ribbon. We can also add items to the quick access toolbar, simply click on any item and if will be added to our toolbar.
2. Ribbon:
The ribbon is the panel at the top portion of the document it has six tabs: Home, Insert, Page Design, Mailings, R9eview, and View. Each tab is divided into groups
3. File Window:
When we click on the File menu, we are brought to the Info screen. It looks like that our document is gone, but it is not. As we click on the options in the File menu, the screen will change accordingly.
- Save: Save the file as a 2010 file.
- Save As: Allows you to choose a different file type (i.e. PDF, Word).
- Open: Browse to a Publisher file.
- Close: Closes the file but keeps Publisher running.
- Info: Edit Business information, use Design Checker, and set Commercial Print Information.
- Recent: List of our recently used Publisher files.
- New: New Publication Screen.
- Print: Print Options.
- Save & Send: Options for saving e mailing the file.
- Help. Microsoft Help.
- Options. Set default options.
- Exit. Closes Publisher (file and program).
Working in Publication:
1. Adding Text:
- From the Home or Insert Tab, select Draw Text Box.
- Place the cursor on the page where we want to draw a text box. _
- Click and drag the cursor across the page to the desired size. The size of the text box can be changed after we have drawn it.
- When we let go of the left click on the mouse, we are brought to the format tab which gives us more options for the text box.
- Type the text in text box.
2. Editing Text:
1. Highlight the text you want to edit.
2. If you are not brought to the Text Box Tools Format Tab, then select it.
3. Text Group Options.
(a) Text Fit! Defines how the text will fit in the text box: Best Fit, Shrink Text on Overflow, Grow Text Box to Fit, Do Not Auto-Fit.
(b) Text Direction. Changes direction to horizontal or vertical.
(c) Hyphenation. Changes hyphenation behavior of selected text.
4. Font Group Options. Style, Font Size, Bold, Italics, Underline, Text Spacing, & Color.
5. Alignment Group Options. Text Box Alignment, Columns, Margins.
6. Effects Group Options. Shadow, Outline, Engrave, Emboss.
3. Change Style of Text Box:
- Click on Text box.
- Click on Drawing tools on Format tab.
- Use shape style group options to change style, shape fill, shape outline, or shape change options.
- Use arrange group options to change Wrap Text, Bring Forward or Backward, Rotate.
4. Inserting Clip Art:
To insert the clip art follow these steps:
- Click on the Insert Tab.
- Click Clip Art. The Clip Art window appears on the right side of the screen.
- Type in a keyword.
- Click Go.
- Browse through the results.
- When we find clipart, click on the thumbnail from the Clip Art Window.
- The Clip Art image will then appear on our page.
![]()
5. Inserting a Picture:
To insert a picture follow these steps:
- Click on the Home or Insert tab.
- Click on Picture.
- Browse to the location of the picture we have saved on our computer.
- Select the picture and click Insert.
6. Insert a Shape:
To insert a shape follow the steps:
- Click on the Home or Insert tab.
- Click on Shapes.
- Select a shapeirom the drop down menu.
- On the page, click and drag to create the shape.
- The shape appears on the page, and we are brought to the Drawing Tools.
- Format tab. From this tab, we can edit the style, fill, outline, and more.
7. Text Wrapping:
Text wrapping is the way our object is set on the page in reference to the text. To do text wrapping following are the steps:
- Select the object.
- Click on the Format tab (Text Box, Drawing or Picture Format).
- In the arrange group, click on Wrap Text. This will determine how text will be arranged around the object.
8. Resizing Objects:
Resizing enables us to resize our objects :
1. Click on the object.
2. Click and drag the handles to resize.
(a) The corner handles will resize the object proportionally.
(b) The handles centered on the lines of the box will stretch the object vertically and horizontally.
The green handle allows us to rotate the object.
9. Moving Objects:
- Click on the object.
- Place our cursor over the solid line so that we see the crosshairs.
- Click and drag the object to the desired location.
10. Deleting Objects:
We can also delete any object, if do not require it in our publication.
1. Click on the object.
2. Press Delete button on the keyboard.
![]()
Frame:
Most publications are divided into several different areas called frames. A frame can contain a variety of objects such as graphics, tables, or text boxes. Frames can be resized, moved and manipulated to suit your needs.
Working with Frames:
Each publication is composed of different frames, such as text frames, picture frames, table frames, and shape/object frames. Click on different areas of the publication to identify the different frames. Handles, little circles on the corners and sides of the frame will appear. The handles help us to show which frame we have selected. These are also used in resizing frames.
Handles:
When we click on a frame, small circles appear around the edge of the frame. These are called handles. We can click and drag on the handles to resize our frame. To move a Picture Frame:
1. Click on the picture.
2. When our cursor turns into a four directional arrow, click and drag the picture frame to the desired location.
To move a Text Frame:
1. Click on the text frame.
2. Rest our cursor near the border of the text frame. When our cursor turns into a four directional arrow, click and drag the text frame to the desired location.
Resizing Frames:
To resize a picture frame:
1. Click on the picture.
2. Rest our cursor on a corner handle. When our cursor turns into a diagonal line with arrows on the ends, click and drag inwards at a diagonal to make it smaller or outwards at a diagonal to make it larger. Using comer handles to resize pictures allows us to keep the picture’s proportions.
To resize a Text Frame:
1. Click on the text frame.
2. Rest your cursor on one of the handles. When your cursor turns into a line with arrows on the ends, click and drag inwards or outwards to resize the text area.
Deleting Frames:
Right-click on the frame that we would like to delete. Select Delete Object from the list of choices. .
Inserting Additional Text Frames
1. Click on Text box from the Insert Tab.
2. Click and drag over an area of the publication.
3. Type the text ypu want to appear.
Viewing Pages in Our Publication:
There are three ways to view pages in a publication:
1. Click on the thumbnails of the pages in the publication from the Page Navigation Window on the left hand side of the screen.
2. From the View tab, we can switch from, single page to two-page spread view as well as choose other viewing options.
Template:
A Template is a tool used in Publisher to help us easily create basic publications. The template has a set of prechosen design styles that we can use as it is or customize as we see fit.
Each template is customizable. Click on a template from the center. On the right side of the screen, we can change the template colors, fonts, and more. Once we have found a template and customized it, click Create. After we click create, we can edit the text boxes, images, and shapes that have been set up by the template as needed.
![]()
Customizing a Template
1. Changing the Design of a Template
To change the design template follow the following steps:
1. Click on the Page Design tab.
2. To change the entire template, click Change Template.
- Choose a template from the pop-up window. If we are currently working in a template and changing to a different template, the information we have entered will conform to the new template.
3. To change the color scheme, browse through the color schemes available in the Schemes group.
- However the mouse over the color scheme to preview.
- To select a color scheme, click on it.
4. To change the font scheme, click on Fonts in the Schemes group.
- Browse through the available font schemes.
- However the mouse over the font scheme to preview.
- To select a font scheme, click on it.
- If we want to create our own font scheme, click.
Page Design:
1. Click the tab Page Design if needed, to change templates, adjust page margins, apply ruler guides, or apply built-in color schemes to the chosen template.
2. We can use the Built-in Ruler Guide templates to help in aligning text boxes, pictures, or other objects. To apply a Built-in Ruler Guide template click on the command Guides in the group Layout, and then choose a template.
3. To add a vertical or horizontal ruler guide repeat the above step, then click on Add Vertical or Horizontal Ruler Guide.
4. To add additional guides, move the mouse pointer oyer the vertical or horizontal ruler, drag the guide in the desired direction when the pointer changes to a two headed arrow.
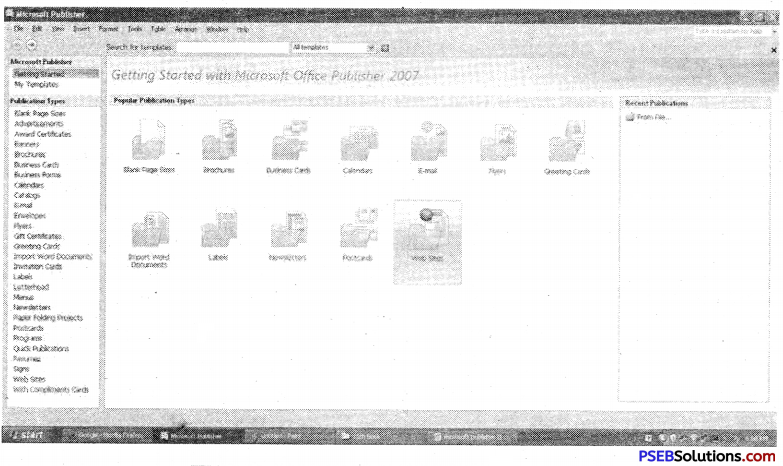
Creating a publication with Templates:
We can create a publication in Publisher by using template.
Available Publication Types: Publisher 2010 allows us:
1. To apply built-in templates.
2. To apply our own custom templates.
3. To search from a variety of templates available on Office.com. Office.com provides a wide selection of popular Publisher templates, including newsletters and flyers.
To find and apply a template in Publisher 2010, dp the following:
1. On the File tab, click New.
2. Under Available Templates, do one of the following:
- To use a template that we already have installed, click My Templates, click the template that we want, and then click Create.
- To use one of the pre-built templates installed in Publisher, under Most Popular or More Templates, click the category that we want, click the template that we want, and then click Create.
- To find and apply a template on Office.com, under Most Popular or More Templates, click the category that we want, click the template that we want, and then click Download.
![]()
Creating Publication with Installed Templates:
We can create any publication easily with the help of the installed templates available in Publisher. We can use pre designed templates in publisher and create so many publications like Brochures, Business Cards, Calendars, Greeting Cards, Labels, Newsletters, Postcards, Advertisements, Award Certificates, Banners, Business Forms, Catalogs, E-mail, Envelops, Flyers, Gift certificates, Invitation cards, Letterhead, menus, resumes and so many quick publications.
Creating Publication with Online Templates:
We can create any publication easily with the help of the internet because we have also a option to create publication using online templates. For online templates, internet facility is available in our system. To find and apply a template on online Templates, click the category that we want, click the template that we want, and then click Download, and then apply that template.
Saving Your Publication:
There are two basic ways to save our publication. First one is to Point and click on the save icon on our toolbar.
Or
Follow these steps:
- Click on the File menu and Save As.
- When the Save As Dialogue Box appears Click Browse and find the location on computer where we want the file saved.
- Type the name of our publication in the File Name field.
- Click on the Save button.
![]()
Printing Your Publication:
There are two basic ways to print your publication.
First one is to click on the print icon on toolbar. This will print one copy of our publication with the default print options.
Or
- Click on the File menu and click Print.
- When the print window appears, select the desired number of copies.
- Choose any other Print Settings- All Pages, Selection, Current Page or Custom Range Manually enter page numbers we want to print How many pages print per sheet of paper Paper Size 1-sided or 2-sided printing Click Print.